アクションコマンドの設定
ActionEventから取り出すことができるアクションコマンドの設定の方法を確認します。アクションコマンドを設定することで複数の呼び出し元がActionEventを発行する場合でも区別することが出来るようになります。設定するにはTimerクラスで用意されている「setActionCommand」メソッドを使います。
setActionCommand
public void setActionCommand(String command)
このタイマーによってトリガーされた ActionEvent 内のアクションコマンドとして配信される文字
列を設定します。null も設定可能です。

パラメータ:
  command - アクションコマンド
引数にはアクションコマンドとして設定したい文字列をString型の値で設定します。
※このメソッドはJ2SE1.6から用意されたメソッドです。
実際には次のように使用します。
Timer timer = new Timer(1000, this);
timer.setActionCommand("timer");
サンプルプログラム
では簡単なサンプルを作成して試してみます。
import javax.swing.*;
import java.awt.BorderLayout;
import java.awt.event.*;

public class TimerTest2 extends JFrame implements ActionListener{

  Timer timer;
  JLabel label;
  int sec;
  JButton startButton;
  JButton stopButton;

  public static void main(String[] args){
    TimerTest2 frame = new TimerTest2();

    frame.setDefaultCloseOperation(JFrame.EXIT_ON_CLOSE);
    frame.setBounds(10, 10, 300, 200);
    frame.setTitle("タイトル");
    frame.setVisible(true);
  }

  TimerTest2(){
    sec = 0;
    label = new JLabel();

    JPanel labelPanel = new JPanel();
    labelPanel.add(label);

    timer = new Timer(1000 , this);
    timer.setActionCommand("timer");

    startButton = new JButton("start");
    startButton.addActionListener(this);
    startButton.setActionCommand("start");

    stopButton = new JButton("stop");
    stopButton.addActionListener(this);
    stopButton.setActionCommand("stop");
    stopButton.setEnabled(false);

    JPanel buttonPanel = new JPanel();
    buttonPanel.add(startButton);
    buttonPanel.add(stopButton);

    getContentPane().add(labelPanel, BorderLayout.CENTER);
    getContentPane().add(buttonPanel, BorderLayout.PAGE_END);
  }

  public void actionPerformed(ActionEvent e){
    String cmd = e.getActionCommand();

    if (cmd.equals("start")){
      stopButton.setEnabled(true);
      startButton.setEnabled(false);

      timer.start();
    }else if (cmd.equals("stop")){
      stopButton.setEnabled(false);
      startButton.setEnabled(true);

      timer.stop();
    }else if (cmd.equals("timer")){
      label.setText(sec + " sec");
      if (sec >= 10){
        stopButton.setEnabled(false);
        startButton.setEnabled(true);

        timer.stop();
        sec = 0;
      }else{
        sec++;
      }
    }
  }
}
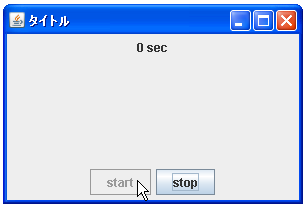
上記をコンパイルした後で実行すると次のように表示されます。
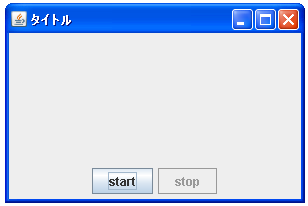
今回は2つのボタンを設置しています。「start」ボタンをクリックするとタイマーが起動します。
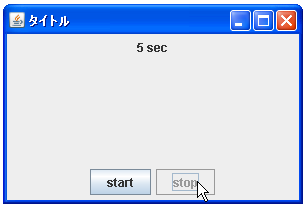
「stop」ボタンをクリックすると10秒経過する前であってもタイマーがストップします。
J2SE1.6以前の場合
Timerクラスで「setActionCommand」が用意されたのはJ2SE1.6からとなっています。その為、J2SE1.6以前のものを使っている場合にはアクションコマンドの代わりにActionEventクラスに対して「getSource」メソッドを使いActionEventの呼び出し元のコンポーネントを取得してTimerクラスのオブジェクトかどうかを判別して下さい。
下記にサンプルソースだけを掲載します。
import javax.swing.*;
import java.awt.BorderLayout;
import java.awt.event.*;

public class TimerTest3 extends JFrame implements ActionListener{

  Timer timer;
  JLabel label;
  int sec;
  JButton startButton;
  JButton stopButton;

  public static void main(String[] args){
    TimerTest3 frame = new TimerTest3();

    frame.setDefaultCloseOperation(JFrame.EXIT_ON_CLOSE);
    frame.setBounds(10, 10, 300, 200);
    frame.setTitle("タイトル");
    frame.setVisible(true);
  }

  TimerTest3(){
    sec = 0;
    label = new JLabel();

    JPanel labelPanel = new JPanel();
    labelPanel.add(label);

    timer = new Timer(1000 , this);

    startButton = new JButton("start");
    startButton.addActionListener(this);
    startButton.setActionCommand("start");

    stopButton = new JButton("stop");
    stopButton.addActionListener(this);
    stopButton.setActionCommand("stop");
    stopButton.setEnabled(false);

    JPanel buttonPanel = new JPanel();
    buttonPanel.add(startButton);
    buttonPanel.add(stopButton);

    getContentPane().add(labelPanel, BorderLayout.CENTER);
    getContentPane().add(buttonPanel, BorderLayout.PAGE_END);
  }

  public void actionPerformed(ActionEvent e){
    if (e.getSource() == timer){
      label.setText(sec + " sec");
      if (sec >= 10){
        stopButton.setEnabled(false);
        startButton.setEnabled(true);

        timer.stop();
        sec = 0;
      }else{
        sec++;
      }
    }else{
      String cmd = e.getActionCommand();

      if (cmd.equals("start")){
        stopButton.setEnabled(true);
        startButton.setEnabled(false);

        timer.start();
      }else if (cmd.equals("stop")){
        stopButton.setEnabled(false);
        startButton.setEnabled(true);

        timer.stop();
      }
    }
  }
}
実行結果は先ほどのサンプルの場合と同じです。
( Written by Tatsuo Ikura )
