- Home ›
- Android入門 ›
- MapViewクラス ›
- HERE
地図の表示
広告
地図を表示するには「MapActivity」クラスを継承したクラスで画面を作成し、その中に「MapView」クラスのオブジェクトを追加した時点でデフォルトの中心座標と拡大率を使って地図が表示されます。
では詳細な地図の設定を行う前にデフォルトで表示される地図の画面を確認しておきます。
プロジェクトを作成しソースコードを次のように変更しました。
package jp.javadrive.android;

import com.google.android.maps.MapActivity;
import android.os.Bundle;
import com.google.android.maps.MapView;
import android.view.ViewGroup;
import android.widget.LinearLayout;
import android.widget.TextView;

public class Test02_01 extends MapActivity {
    private final int FP = ViewGroup.LayoutParams.FILL_PARENT;
    private final int WC = ViewGroup.LayoutParams.WRAP_CONTENT;

    @Override public void onCreate(Bundle icicle) {
        super.onCreate(icicle);

        LinearLayout linearLayout = new LinearLayout(this);
        linearLayout.setOrientation(LinearLayout.VERTICAL);
        setContentView(linearLayout);

        TextView text = new TextView(this);
        text.setText("Map Sample");
        linearLayout.addView(text, createParam(WC, WC));

        MapView map = new MapView(this);

        linearLayout.addView(map, createParam(WC, WC));
    }

    private LinearLayout.LayoutParams createParam(int w, int h){
        return new LinearLayout.LayoutParams(w, h);
    }
}
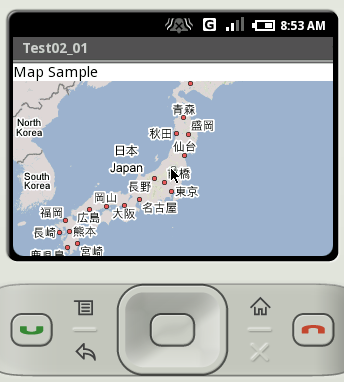
ビルド後にエミュレーター上で実行します。

今回のサンプルではラベルと地図を表示しました。
表示された地図には基本機能としてマウスドラッグによる地図の移動や、ダブルクリックによる縮尺の拡大を行うことが出来ます。

( Written by Tatsuo Ikura )
