ログの出力
ログの出力方法を確認します。ログにはデバック用に変数の値を出力したり実行時エラーのエラー内容を出力したりといった用途が考えられますが、後でログを確認する時に便利なように書き出される内容をいくつかの種類に分類して書き出す事ができるようになっています。種類には次のようなものがあります。
ERROR    エラー
WARN     警告
INFO     情報
DEBUG    デバック
VERBOSE
ログの種類別にログを書き出すためのstaticメソッドがそれぞれ用意されています。
ERROR:
e
public static int e(String tag, String msg)
Send an ERROR log message.

Parameters:
  tag  Used to identify the source of a log message. It usually identfies
    the class or activity where the log call occurs.
  msg  The message you would like logged.
WARN:
w
public static int w(String tag, String msg)
Send a WARN log message.

Parameters:
  tag  Used to identify the source of a log message. It usually identfies
    the class or activity where the log call occurs.
  msg  The message you would like logged.
INFO:
i
public static int i(String tag, String msg)
Send an INFO log message.

Parameters:
  tag  Used to identify the source of a log message. It usually identfies
    the class or activity where the log call occurs.
  msg  The message you would like logged.
DEBUG:
d
public static int d(String tag, String msg)
Send a DEBUG log message.

Parameters:
  tag  Used to identify the source of a log message. It usually identfies
    the class or activity where the log call occurs.
  msg  The message you would like logged.
VERBOSE:
v
public static int v(String tag, String msg)
Send a VERBOSE log message.

Parameters:
  tag  Used to identify the source of a log message. It usually identfies
    the class or activity where the log call occurs.
  msg  The message you would like logged.
それぞれのメソッドは基本的には使い方は同じです。1番目の引数にタグを表す文字列を指定し、2番目の引数にログとして出力する文字列を指定します。
タグに指定した文字列を使ってログをフィルタすることが出来ます。特定のアプリケーションが出力したログだけを確認したい場合などのためにタグにはアプリケーションを表す任意の文字列などを指定しておくと便利です。
2番目の引数には例えばデバック情報であれば変数の値や、エラー情報であれば例外発生時のエラー内容などを文字列として指定します。
具体的には次のように記述します。
private static String TAG = "MyApp";

@Override public void onCreate(Bundle icicle) {
    super.onCreate(icicle);

    int x = 10;
    Log.d("MyApp", "x=" + x);
}
なおログはプログラム中に明示的に出力したものの他に、Androidのシステムが出力するものもあります。
サンプルプログラム
それでは実際に試してみます。プロジェクトを作成しソースコードを次のように変更しました。
package jp.javadrive.android;

import android.app.Activity;
import android.os.Bundle;
import android.widget.LinearLayout;
import android.view.View;
import android.view.ViewGroup;
import android.widget.Button;
import android.widget.EditText;
import android.widget.TextView;
import android.view.View.OnClickListener;
import android.util.Log;

public class Test02_01 extends Activity implements OnClickListener
{
    private final int FP = ViewGroup.LayoutParams.FILL_PARENT;
    private final int WC = ViewGroup.LayoutParams.WRAP_CONTENT;
    private final String TAG = "Test02_01";

    private EditText editLeft;
    private EditText editRight;
    private TextView textResult;
    private Button buttonCalc;
    private Button buttonClear;

    @Override protected void onCreate(Bundle icicle) {
        super.onCreate(icicle);

        LinearLayout linearLayout = new LinearLayout(this);
        linearLayout.setOrientation(LinearLayout.VERTICAL);
        setContentView(linearLayout);


        LinearLayout calcLayout = new LinearLayout(this);
        calcLayout.setOrientation(LinearLayout.HORIZONTAL);
        linearLayout.addView(calcLayout, createParam(WC, WC));

        editLeft = new EditText(this);
        editLeft.setWidth(50);
        calcLayout.addView(editLeft, createParam(WC, WC));

        TextView textPlus = new TextView(this);
        textPlus.setText("+");
        calcLayout.addView(textPlus, createParam(WC, WC));

        editRight = new EditText(this);
        editRight.setWidth(50);
        calcLayout.addView(editRight, createParam(WC, WC));

        TextView textEqual = new TextView(this);
        textEqual.setText("=");
        calcLayout.addView(textEqual, createParam(WC, WC));

        textResult = new TextView(this);
        textResult.setText("");
        calcLayout.addView(textResult, createParam(WC, WC));


        LinearLayout buttonLayout = new LinearLayout(this);
        buttonLayout.setOrientation(LinearLayout.HORIZONTAL);
        linearLayout.addView(buttonLayout, createParam(WC, WC));

        buttonCalc = new Button(this);
        buttonCalc.setText("Calc");
        buttonCalc.setOnClickListener(this);
        buttonLayout.addView(buttonCalc, createParam(WC, WC));

        buttonClear = new Button(this);
        buttonClear.setText("Clear");
        buttonClear.setOnClickListener(this);
        buttonLayout.addView(buttonClear, createParam(WC, WC));
    }

    private LinearLayout.LayoutParams createParam(int w, int h){
        return new LinearLayout.LayoutParams(w, h);
    }

    public void onClick(View v) {
        if (v == buttonCalc){
            try{
                CharSequence cs1 = editLeft.getText();
                int leftVal = Integer.parseInt(cs1.toString());

                CharSequence cs2 = editRight.getText();
                int rightVal = Integer.parseInt(cs2.toString());

                int sum = leftVal + rightVal;

                textResult.setText(Integer.toString(sum));
                Log.d(TAG, "CALC:" + leftVal + "+" + rightVal + "=" + sum);
            }catch(NumberFormatException e){
                Log.e(TAG, e.toString());
            }
        }else if (v == buttonClear){
            editLeft.setText("");
            editRight.setText("");
            textResult.setText("");
        }
    }
}
ビルド後にエミュレーター上で実行します。
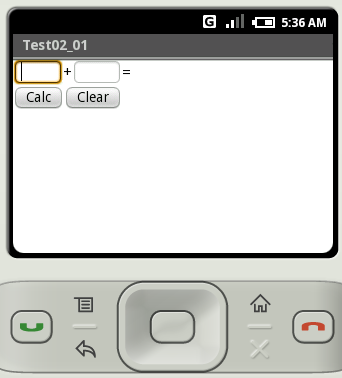
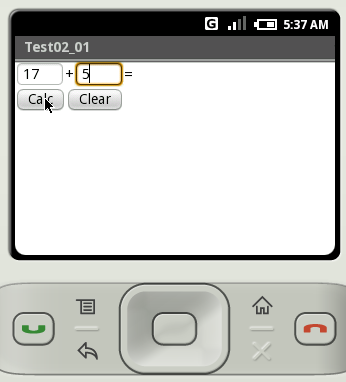
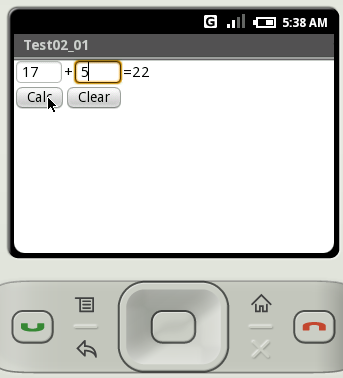
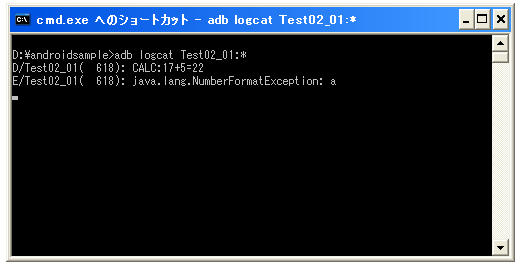
今回のアプリケーションでは加算を行います。数値を二つ入力し「CALC」ボタンをクリックすると二つの値を加算した結果を表示します。そしてログにデバック情報として計算した結果を出力しています。
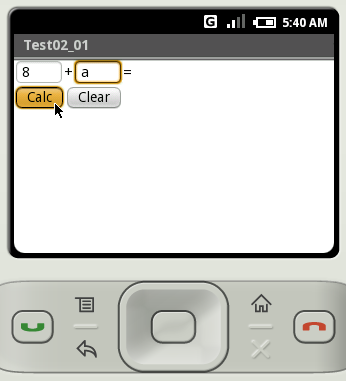
数値ではない値を入力すると例外が発生します。この時はログにエラー情報を出力しています。
出力されたログを確認してみます。
( Written by Tatsuo Ikura )

 JavaDrive