- Home ›
- Android入門 ›
- LinearLayoutクラス ›
- HERE
LinearLayoutを他のLinearLayoutに子ビューとして追加
広告
「LinearLayout」クラスも「View」クラスのサブクラスですので「LinearLayout」クラスのオブジェクトも他の「LinearLayout」クラスのオブジェクトに子ビューとして追加できます。
具体的には次のように記述します。
private final int FP = ViewGroup.LayoutParams.FILL_PARENT;
private final int WC = ViewGroup.LayoutParams.WRAP_CONTENT;

@Override public void onCreate(Bundle icicle) {
    super.onCreate(icicle);

    LinearLayout linearLayout = new LinearLayout(this);
    linearLayout.setOrientation(LinearLayout.VERTICAL);
    setContentView(linearLayout);

    Button button1 = new Button(this);
    button1.setText("Button1");
    linearLayout.addView(button2, new LinearLayout.LayoutParams(WC, WC));

    Button button2 = new Button(this);
    button2.setText("Button2");
    linearLayout.addView(button2, new LinearLayout.LayoutParams(WC, WC));


    LinearLayout inLinearLayout = new LinearLayout(this);
    inLinearLayout.setOrientation(LinearLayout.HORIZONTAL);

    TextView text1 = new TextView(this);
    text1.setText("Text");
    inLinearLayout.addView(text1, new LinearLayout.LayoutParams(WC, WC));

    TextView text2 = new TextView(this);
    text2.setText("Text");
    inLinearLayout.addView(text2, new LinearLayout.LayoutParams(WC, WC));

    linearLayout.addView(inLinearLayout, new LinearLayout.LayoutParams(WC, WC));
}
LinearLayoutや他のレイアウトを組み合わせて利用することで、より複雑なレイアウトが可能となります。
サンプルプログラム
それでは実際に試してみます。プロジェクトを作成しソースコードを次のように変更しました。
package jp.javadrive.android;

import android.app.Activity;
import android.os.Bundle;
import android.widget.LinearLayout;
import android.widget.Button;
import android.widget.TextView;
import android.view.ViewGroup;

public class Test05_01 extends Activity
{
    private final int FP = ViewGroup.LayoutParams.FILL_PARENT;
    private final int WC = ViewGroup.LayoutParams.WRAP_CONTENT;

    /** Called with the activity is first created. */
    @Override
    public void onCreate(Bundle icicle)
    {
        super.onCreate(icicle);

        LinearLayout linearLayout = new LinearLayout(this);
        linearLayout.setOrientation(LinearLayout.VERTICAL);
        setContentView(linearLayout);

        LinearLayout inLinearLayout = new LinearLayout(this);
        inLinearLayout.setOrientation(LinearLayout.HORIZONTAL);

        Button button1 = new Button(this);
        button1.setText("Button1");
        inLinearLayout.addView(button1, createParam(WC, WC));

        Button button2 = new Button(this);
        button2.setText("Button2");
        inLinearLayout.addView(button2, createParam(WC, WC));

        Button button3 = new Button(this);
        button3.setText("Button3");
        inLinearLayout.addView(button3, createParam(WC, WC));

        linearLayout.addView(inLinearLayout, createParam(WC, WC));

        TextView text1 = new TextView(this);
        text1.setText("Text");
        linearLayout.addView(text1, createParam(WC, WC));

        TextView text2 = new TextView(this);
        text2.setText("Text");
        linearLayout.addView(text2, createParam(WC, WC));
    }

    private LinearLayout.LayoutParams createParam(int w, int h){
        return new LinearLayout.LayoutParams(w, h);
    }
}
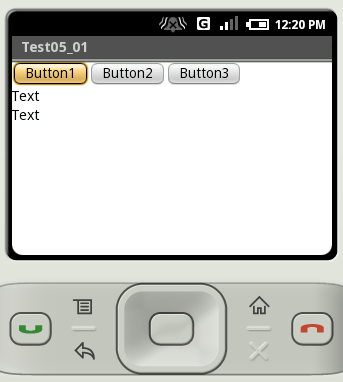
ビルド後にエミュレーター上で実行します。
( Written by Tatsuo Ikura )
