- Home ›
- Android入門 ›
- ImageButtonクラス ›
- HERE
クリック処理
ボタンがクリックされた時に処理を行う場合の記述方法を確認します。匿名クラスを使う方法とOnClickListenerインターフェースの実装する方法がありますが今回はOnClickListenerインターフェースの実装する方法を試して見ます。
手順は次の通りです。自分自身のクラスに「OnClickListener」インタフェースを実装し、必要な「onClick」メソッドを定義します。
import android.app.Activity;
import android.os.Bundle;
import android.view.View.OnClickListener;

public class Test extends Activity implements OnClickListener{
    @Override protected void onCreate(Bundle icicle) {
        super.onCreate(icicle);

    }

    public void onClick(View v) {
        /* .... */
    }
}
そしてクリックイベントを受け取るための設定を「ImageButton」クラスのオブジェクトに対して行います。「ImageButton」クラスの親クラスである「View」クラスで定義されている「setOnClickListener」メソッドを使います。
setOnClickListener
public void setOnClickListener(OnClickListener l)
Register a callback to be invoked when this view is clicked.

Parameters:
  l  The callback that will run
引数には「OnClickListener」インターフェースを実装したクラスのオブジェクトを指定します。例えば自分自身のクラスで「OnClickListener」インターフェースを実装している場合には「this」を指定して下さい。
具体的には次のように記述します。
private final int WC = ViewGroup.LayoutParams.WRAP_CONTENT;

@Override protected void onCreate(Bundle icicle) {
    super.onCreate(icicle);

    ImageButton imgbutton = new ImageButton(this);
    imgbutton.setImageResource(R.drawable.bitmapsample);
    imgbutton.setOnClickListener(this);
    setContentView(imgbutton, new LayoutParams(WC, WC));
}
サンプルプログラム
それでは実際に試してみます。プロジェクトを作成しソースコードを次のように変更しました。
package jp.javadrive.android;
import android.app.Activity;
import android.os.Bundle;
import android.widget.LinearLayout;
import android.view.View;
import android.view.ViewGroup;
import android.widget.ImageButton;
import android.view.View.OnClickListener;
import android.app.AlertDialog;
public class Test05_01 extends Activity implements OnClickListener
{
private final int FP = ViewGroup.LayoutParams.FILL_PARENT;
private final int WC = ViewGroup.LayoutParams.WRAP_CONTENT;
private ImageButton imgbutton1;
private ImageButton imgbutton2;
@Override protected void onCreate(Bundle icicle) {
super.onCreate(icicle);
LinearLayout linearLayout = new LinearLayout(this);
linearLayout.setOrientation(LinearLayout.HORIZONTAL);
setContentView(linearLayout);
imgbutton1 = new ImageButton(this);
imgbutton1.setImageResource(R.drawable.star1);
imgbutton1.setPadding(25, 25, 25, 25);
imgbutton1.setOnClickListener(this);
linearLayout.addView(imgbutton1, createParam(WC, WC));
imgbutton2 = new ImageButton(this);
imgbutton2.setImageResource(R.drawable.star1);
imgbutton2.setPadding(25, 25, 25, 25);
imgbutton2.setOnClickListener(this);
linearLayout.addView(imgbutton2, createParam(WC, WC));
}
private LinearLayout.LayoutParams createParam(int w, int h){
return new LinearLayout.LayoutParams(w, h);
}
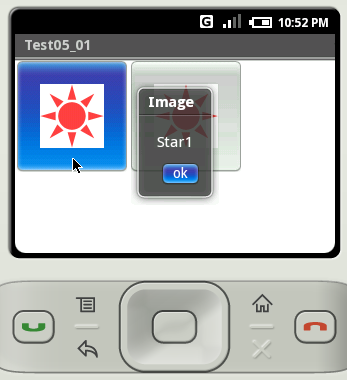
public void onClick(View v) {
if (v == imgbutton1){
AlertDialog.show(this, "Image", "Star1", "ok", false);
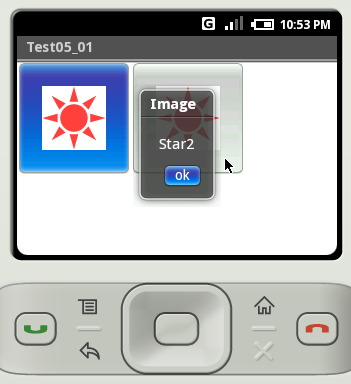
}else if (v == imgbutton2){
AlertDialog.show(this, "Image", "Star2", "ok", false);
}
}
}
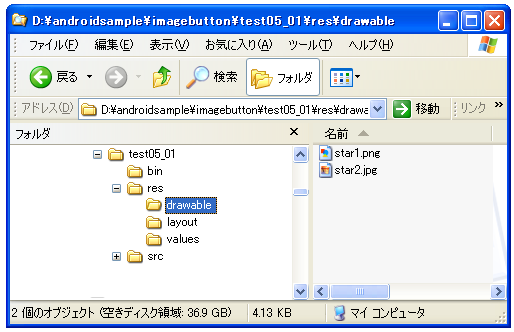
また画像をリソースとしてプロジェクト内の「res/drawable」ディレクトリに配置しました。
ビルド後にエミュレーター上で実行します。

ボタンをクリックするとボタンに応じた処理を行います。
( Written by Tatsuo Ikura )
