- Home ›
- Android入門 ›
- ImageButtonクラス ›
- HERE
リソースIDで表示画像を指定
広告
前のページではBitmapクラスのオブジェクトを作成してから、そのオブジェクトを引数に指定してImageButtonクラスを作成しました。今度はリソースに登録された画像に対するリソースIDを指定してImageButtonクラスのオブジェクトを作成する方法を確認します。「ImageButton」クラスの親クラスである「ImageView」クラスで用意されている「setImageResource」メソッドを使います。
setImageResource
public void setImageResource(int resid)
Parameters:
  resid  画像リソースに対応するリソースID
1番目の引数にはりソースIDを指定します。画像ファイルなどをリソースとして登録し、「R.java」ファイルでリソースに対して割り当てられたリソースIDを指定して下さい。
具体的には次のように記述します。
private final int WC = ViewGroup.LayoutParams.WRAP_CONTENT;

@Override protected void onCreate(Bundle icicle) {
    super.onCreate(icicle);

    ImageButton imgbutton = new ImageButton(this);
    imgbutton.setImageResource(R.drawable.bitmapsample);
    setContentView(imgbutton, new LayoutParams(WC, WC));
}
サンプルプログラム
それでは実際に試してみます。プロジェクトを作成しソースコードを次のように変更しました。
package jp.javadrive.android;

import android.app.Activity;
import android.os.Bundle;
import android.widget.LinearLayout;
import android.view.ViewGroup;
import android.widget.ImageButton;

public class Test03_01 extends Activity
{
    private final int FP = ViewGroup.LayoutParams.FILL_PARENT;
    private final int WC = ViewGroup.LayoutParams.WRAP_CONTENT;

    @Override protected void onCreate(Bundle icicle) {
        super.onCreate(icicle);

        LinearLayout linearLayout = new LinearLayout(this);
        linearLayout.setOrientation(LinearLayout.HORIZONTAL);
        setContentView(linearLayout);

        ImageButton imgbutton1 = new ImageButton(this);
        imgbutton1.setImageResource(R.drawable.star1);
        imgbutton1.setPadding(5, 5, 5, 5);
        linearLayout.addView(imgbutton1, createParam(WC, WC));

        ImageButton imgbutton2 = new ImageButton(this);
        imgbutton2.setImageResource(R.drawable.star2);
        linearLayout.addView(imgbutton2, createParam(120, 100));
    }

    private LinearLayout.LayoutParams createParam(int w, int h){
        return new LinearLayout.LayoutParams(w, h);
    }
}
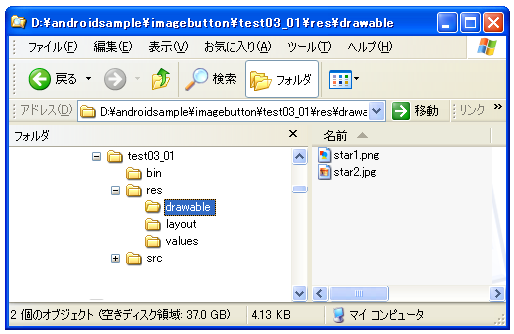
また画像をリソースとしてプロジェクト内の「res/drawable」ディレクトリに配置しました。
ビルド後にエミュレーター上で実行します。
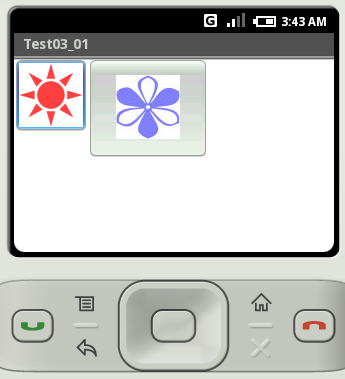
このようにBitmapクラスのオブジェクトを一度作成しなくても、リソースIDを使って直接画像を読み込んで表示することが出来ます。
なお作成された「R.java」は次のようになっていました。
/* AUTO-GENERATED FILE.  DO NOT MODIFY.
 *
 * This class was automatically generated by the
 * aapt tool from the resource data it found.  It
 * should not be modified by hand.
 */

package jp.javadrive.android;

public final class R {
    public static final class attr {
    }
    public static final class drawable {
        public static final int star1=0x7f020000;
        public static final int star2=0x7f020001;
    }
    public static final class layout {
        public static final int main=0x7f030000;
    }
    public static final class string {
        public static final int app_name=0x7f040000;
    }
}
( Written by Tatsuo Ikura )
