- Home ›
- Android入門 ›
- GridViewクラス ›
- HERE
水平方向の項目間の間隔
広告
グリッド内に配置された項目間の水平方向の間隔を設定します。「GridView」クラスで用意されている「setHorizontalSpacing」メソッドを使います。
setHorizontalSpacing
public void setHorizontalSpacing(int horizontalSpacing)
Set the amount of horizontal (x) spacing to place between each item in
the grid.

Related XML Attributes:
  android:horizontalSpacing
Parameters:
  horizontalSpacing  The amount of horizontal space between items, in
    pixels.
1番目の引数に項目間の水平方向の間隔をピクセル単位で指定します。
具体的には次のように記述します。
private final int FP = ViewGroup.LayoutParams.FILL_PARENT;
private final int WC = ViewGroup.LayoutParams.WRAP_CONTENT;
private String[] data = {"Apple", "Lemon", "Orange", "Strawberry"};

@Override protected void onCreate(Bundle icicle) {
    super.onCreate(icicle);

    ArrayAdapter<String> arrayAdapter
        = new ArrayAdapter<String>(this, R.layout.rowdata, data);

    GridView grid  = new GridView(this);
    grid.setAdapter(arrayAdapter);
    grid.setHorizontalSpacing(10);
    setContentView(grid, new LayoutParams(WC, FP));
}
サンプルプログラム
それでは実際に試してみます。プロジェクトを作成しソースコードを次のように変更しました。
package jp.javadrive.android;

import android.app.Activity;
import android.os.Bundle;
import android.widget.LinearLayout;
import android.view.ViewGroup;
import android.widget.GridView;
import android.widget.ArrayAdapter;
import android.graphics.Color;

public class Test05_01 extends Activity
{
    private final int FP = ViewGroup.LayoutParams.FILL_PARENT;
    private final int WC = ViewGroup.LayoutParams.WRAP_CONTENT;

    private String[] data = {"Tokyo", "Osaka", "Aichi", "Hokkaido",
                             "Fukuoka", "Chiba", "Kyoto", "Nara"};

    @Override protected void onCreate(Bundle icicle) {
        super.onCreate(icicle);

        LinearLayout linearLayout = new LinearLayout(this);
        linearLayout.setOrientation(LinearLayout.HORIZONTAL);
        setContentView(linearLayout);

        GridView grid  = new GridView(this);
        grid.setNumColumns(3);
        grid.setHorizontalSpacing(20);
        grid.setBackgroundColor(Color.LTGRAY);
        linearLayout.addView(grid, createParam(250, FP));

        ArrayAdapter<String> arrayAdapter
            = new ArrayAdapter<String>(this, R.layout.rowdata, data);

        grid.setAdapter(arrayAdapter);
    }

    private LinearLayout.LayoutParams createParam(int w, int h){
        return new LinearLayout.LayoutParams(w, h);
    }
}
またレイアウトXMLファイルをリソースとしてプロジェクト内の「res/layout」ディレクトリに配置しました。ファイル名は「rowdata.xml」です。ファイルには次のように記述します。
<?xml version="1.0" encoding="utf-8"?>
<TextView
    xmlns:android="http://schemas.android.com/apk/res/android"
    android:layout_width="wrap_content"
    android:layout_height="wrap_content"
/>
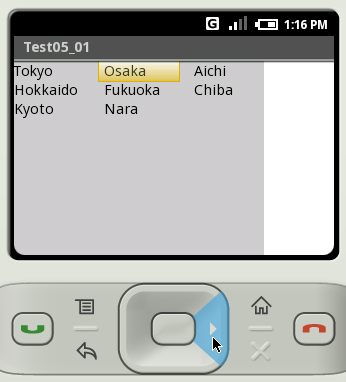
ビルド後にエミュレーター上で実行します。
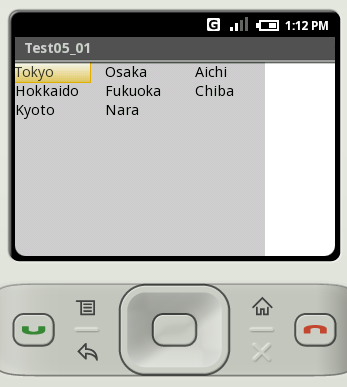
今回は項目間の水平間隔を20ピクセルに設定してあります。グリッドの場合はグリッドの幅を列数で均等に割った幅が各項目に設定されているので水平間隔を設定してもグリッド全体の幅は変わりがありません。グリッド内での各項目の幅が、今回設定した項目間の間隔を考慮して変更されます。
( Written by Tatsuo Ikura )
